How I Migrated From WordPress to Hugo
Table of Contents
Intro #
When I started this blog in 2015 it was more to learn than to actually write anything. WordPress was easy enough to set up and maintain along with the plethora of plugins to mess with.
Over the years I’ve grown to dislike the bloat of it all but never found a solution that satisfied me. Jekyll was too programmer-ey, friends were telling me firsthand about the annoyances of Ghost, Medium was just not for me, etc etc…
One of my goals for this year is to post more, finish the countless posts piling up in my drafts and to stop starting posts only to give up and abandon them forever.
In an effort to live up to this goal, I decided to finally rebase this blog and change the way I work with it. It just so happens that Hugo has come a long way since I last looked at it, and I thought it would be the perfect candidate for a reboot.
Getting Started #
Getting started is documented well. Setting up a local environment is easy, quick and lightweight. Once that’s done select a theme and follow its instructions and you’re good to go.
This blog runs on Blowfish.
Personal Website & Blog Theme for Hugo
Migrating #
Migration Tools/Scripts #
The main tool mentioned in many places, including the offical Hugo docs, is the following tool:
Hugo is static site generator written in golang. Wordpress is a tool for remote access to your server ;-) ❗️Contributions welcome!
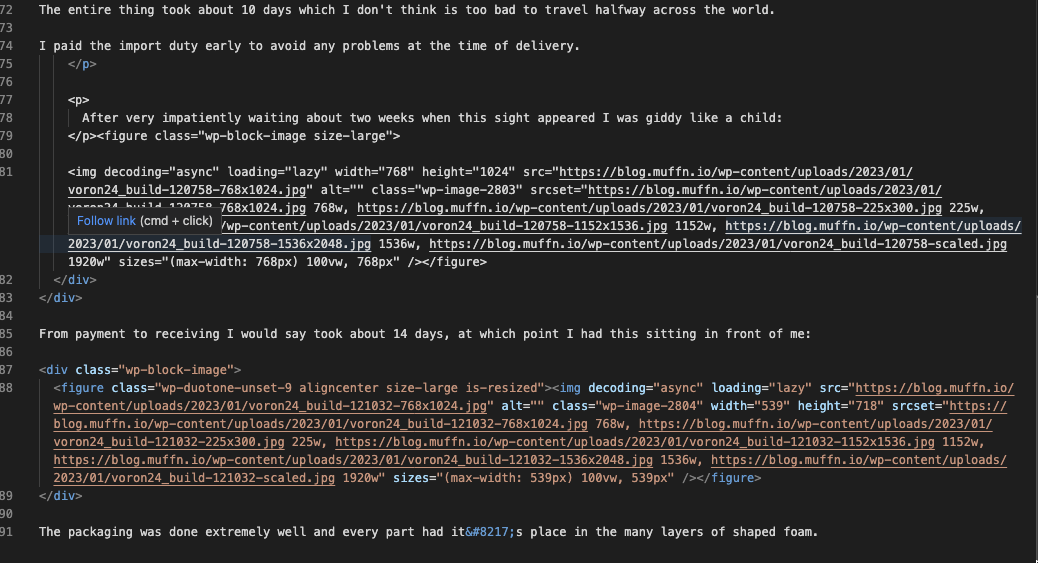
Using that particular migration tool proved to be extremely frustrating however. The output is basically this, everywhere:

Images are put in their own directory and not with the post itself (not that it matters that much as the body of the posts still points to the old URLs). I dread to think the pain one would have to go through to migrate a decently sized site like this.
Listen, I’m not knocking the tool, it’s fucking amazing that it exists in the first place and gives a good starting point for migration. It would do the job enough if it wasn’t for the tool I ended up using…
Converts a WordPress export XML file into Markdown files.
This project made my migration an absolute breeze. Not only did it take a standard WordPress export, but it does a damn amazing job at reformatting everything in markdown. As if that wasn’t good enough, it downloads all your images, places them with each posts and replaces the links to them in markdown.

lonekorean my dude, I love you.
After running my export through lonekorean’s tool, I was given an output that was 85%-90% ready to be deployed to Hugo. I went through the posts I wanted to keep, correcting the bits and bobs here and there, testing on localhost as I went through until I was happy with the posts.
URLs #
SEO is well and truly a nightmare. My blog had already been down for a month and a half recently due to co-location issues and I wasn’t prepared to have all my URLs change. Telling Google about these changes in the past didn’t really help and took a long time.
My old URL schema was the pretty URLs in WordPress which looked like:
https://blog.muffn.io/this-is-a-blog-post
and what it is on my Hugo is:
https://blog.muffn.io/post/this-is-a-blog-post
There are 2 ways to make the migration painless.
- Change the post URL:
You can simply tell Hugo to make the URL of the post the old one. In the
front matterthis is simply:
url: https://blog.muffn.io/this-is-a-blog-post
- Add an alias:
The better option, and what I did is to just alias the URL. The post retains the default Hugo format but redirects on any URL set as an alias. To do this was as simple as adding the
aliasesto thefront matterlike so:
aliases: /building-a-rackmount-storage-server/
This is documented and can cover various scenarios.
I Hate Managing Comments #
I had taken for granted how easy WordPress had made comments for me.
I could let people comment on stuff anonymously with ease and all you needed was an email address which you could fudge if you wanted. I’d even disabled the default behavior of WordPress that stores the IP address of commenters using some additions to functions.php.
function wsg_remove_commentsip( $comment_author_ip )
{
return ”;
}
add_filter( ‘pre_comment_user_ip’, ‘wsg_remove_commentsip’ );
The issue was, I now had about a few hundred comments from over the years that I really didn’t want to lose.
There are a few ways of going about this, none of them very elegant in my opinion. There is a selection of options on Hugo’s documentation.
Using Disqus seems to be the recommended way and the system I begrudgingly ended up using.
Exporting and importing the comments was easy using the manual method, simply use the built-in WordPress site exporter and import that into Disqus. Do not use the WordPress plugin. It hasn’t been updated in years and unsurprisingly just doesn’t work, despite still being advertised as the best way to import to Disqus, by Disqus.
Disqus has a tool for URL mapping to link to the correct posts and that’s about it, everything is done.
That being said, fuck Disqus. I really don’t want this on my blog and my next step in this migration will be to migrate again to another system that is not a bloated privacy nightmare. So, if you’re still seeing Disqus at the bottom of these pages, I’m sorry and I’m working on it. ❤️
Depending on how it goes I will make a blog post on setting that up. I’m currently looking at Staticman but there are a few contenders. I don’t want a solution that’s fully self-hosted as I’ve moved away from doing that with the blog itself now. Storing everything in git would be :chefkiss:. The migration of existing comments poses a roadblock again, but we shall see…
My New Workflow Using VSCode #
My editor of choice is VSCode because …why wouldn’t it be? I’m not a coder (and won’t ever be with my potato brain) so I haven’t used it as much as the next person, but I can totally see why it gets the praise it does. I’m finally being able to use it for more than simple script writing and file editing.
With all the extensions, user options, git functionality, powerful file editor, image viewer it really is all I need to write and deploy to my blog.
My workflow now looks like:
This flow was created in markdown using Mermaid.
Markdown #
I originally thought writing everything in markdown would be a chore coming from a fully thiccboii editor but I’m glad that’s not the case.
I think with age I am happy with things being more streamlined and simple as opposed to having as fully featured an editor as possible.
Developing locally #
Everything is developed locally and committed when I want to push a change or make a backup. This is great as Hugo is so lightweight I can leave it running on my machine without issue if I forget to, say, close VSCode 👀.
I use the build command noted below to keep the local version dynamically updated with my edits.
Instant Previews #
Instant previews are dank. I have an annoying tendency to want to see how things look for real after every few sentences, Hugo makes this less of an annoyance. Simply running hugo server --navigateToChanged in the terminal has my blog updating in milliseconds every time I CMD + S. I have a Firefox window in the background and with an CMD + TAB I’m there, looking at the changes I just made, on the page the change was made.
Dyslexia #
One of the main reasons for using WordPress in the past was the powerful editor allowing for very personal workflows. Grammarly was key to my blog writing, I simply do not know what I would do without it or an equivalent tool.
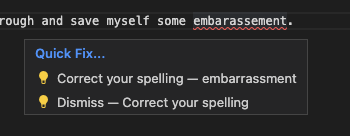
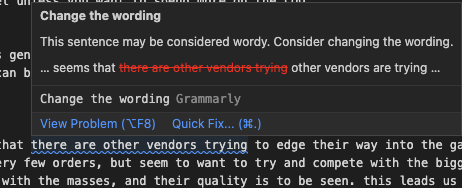
Thankfully, switching to VSSCode has been made even easier with the Grammerly plugin for VSCode!
Even typing this now is bringing a smile to my face as I can see my silly mistakes highlighted.
Once installed, I logged in using grammarly.login and added to my .vscode/settings.json as follows:
    "grammarly.selectors": [
        {
            "language": "markdown",
            "scheme": "file",
            "pattern": "content/**/*.md"
        }
Now all my markdown files for my blog posts are automagically checked and I can go through and save myself some embarrassment.


Build Command #
The build command I use locally is the following:
hugo server --navigateToChanged --buildDrafts --minify
This allows me to see any issues before committing, including being able to view drafts that won’t be published when committed.
Deployment #
Options aplenty are available for hosting static sites for free.
Normally, of course, I’d just host it myself a la the WordPress version along with loads of other sites/services I manage but I’ve been taking a more hands-off approach to things recently. If I can have someone else pull, build and host Hugo for free then so be it.
I use Github to store the blog and it works well as a backup too. Once I have comments stored in git too it will all be together. The moment I commit to master any of the services below will rebuild the site.
Cloudflare Pages #
Cloudflare pages is what I probably would have used was it not for the following. I already use Cloudflare for a variety of their services and it would be easy enough to add some more, especially since my Ansible workflows are all set up for Cloudflare.
- CF pages would complain upon building that their asset limit is 25MB. I have one gif on one of my posts that’s about 50MB. Not a huge deal, I’ll just embed it or something that’s not unreasonable.
- CF pages would build an entirely blank site.
That last point is something I just couldn’t fix. The build would succeed as expected and then the webpage would be completely blank. The kicker is that every other service I tried wouldn’t have this issue.
Github Pages #
Github pages isn’t free for private repos. I don’t care that much about this blog repo being private but there are so many other options that do allow it so I didn’t bother with GH pages. If this ever changes, I would happily use GH pages.
Render #
I tried Render too and it worked just fine as expected. No real issues here just decided to go another route.
Surge #
Surge seems interesting. I didn’t try it myself but I might do at some point because the management seems cool.
Netlify #
Netlify is what I ended up using. It comes recommended by friends and frequently on the internet. The free tier is generous and like all the other services, it’s pretty much set it and forget it.
Within a minute or two of a push to my master branch on Github, Netlify has cloned, built, and republished the latest commit.
One difference with Netlify is the requirement to have a netlify.toml that indicates how/what to build. I like this approach as I can change things like the Hugo version with the commit itself, further eliminating the need to touch the Netlify dashboard.
[build]
  command = "hugo --gc --minify -b $URL"
  publish = "public"

[build.environment]
  NODE_ENV = "production"
  GO_VERSION = "1.16"
  TZ = "UTC"

[context.production.environment]
  HUGO_VERSION = "0.110.0"
  HUGO_ENV = "production"

[context.deploy-preview.environment]
  HUGO_VERSION = "0.110.0"
Options, Options, Options #
The great thing about static site hosting is that there are so many options. Pick one, try it and if you don’t like it try another one.
- Google Cloud
- Amazon S3
- Firebase
- Vultr
- Vercel
- DigitalOcean App Platform
- Statically
The list just goes on and on.
Improvements #
Comments #
As mentioned above, the comments just need to get yoit. With any luck if you’re reading this sometime in the future there isn’t a Disqus box below, if there is I have predictably procrastinated.
Analytics #
I’m currently using Google Analytics as it’s built into Hugo, but again, it’s a privacy nightmare that I don’t want. I imagine 90% of my audience blocks this anyway soooo…..
The WordPress Jetpack analytics were surprisingly good and I was able to find out my blog was being used on some University course materials here in the UK. I didn’t feel like it was too intrusive, it just kinda worked.
I don’t care to track people, it’s just nice knowing the traffic stats of this blog and what is popular and where the clicks are coming from, sometimes I find a forum post where this blog has been linked for example.
All that being said, I would like to deploy my own analytics for these use cases. Current contenders at the time of writing are GoatCounter and Plausible but there are plenty of others to try.
Fin #
And with that, I finally achieved a long-standing goal I’ve had to GTFO WordPress and I am really happy with how everything went and how it all turned out. Even better that it took me a couple of hours and not days/weeks like I had anticipated something like this taking in the past.
If you’re reading this because you’re thinking about doing the same, do it!
